| 1.Purchase of Headlights
I bought a pair of Nissan G35 (FX35) bi xenon
headlights. I wanted bi xenon projectors as
these are fitted with a solenoid that lifts
a cut off shield allowing a full beam when high
beam is activated. These projectors effectively
become a low beam and high beam headlight with
3 times the light output of a standard halogen
headlight all in one. (Maybe 10 times brighter
than a R33?)
Further research revealed you can buy a clear
projector lens that increases the light output
even more and produces a blue/purple haze across
the cut off line. I had to have these lenses
as well! I ended up purchasing Nissan G35 projects,
HID ballasts, globes and the clear lens from
James at the TOPCITY hid manufacturer. The service
was great and the goods arrived from the US
to Oz in under4 days.
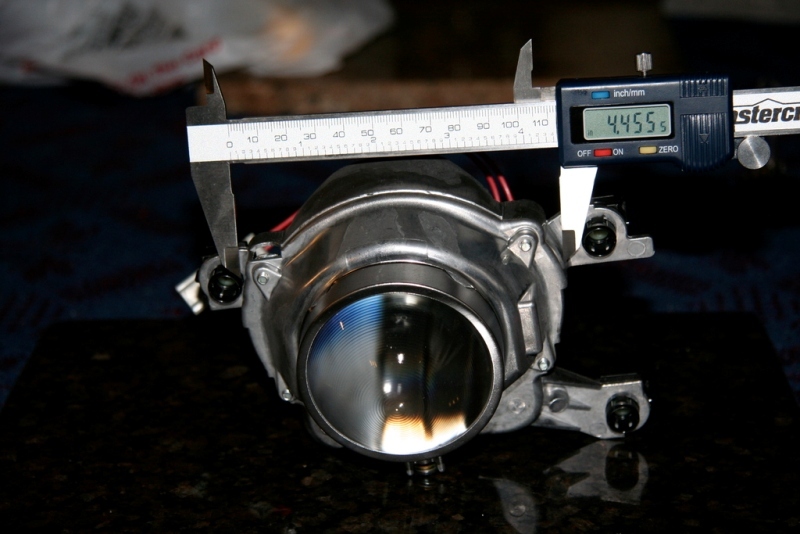
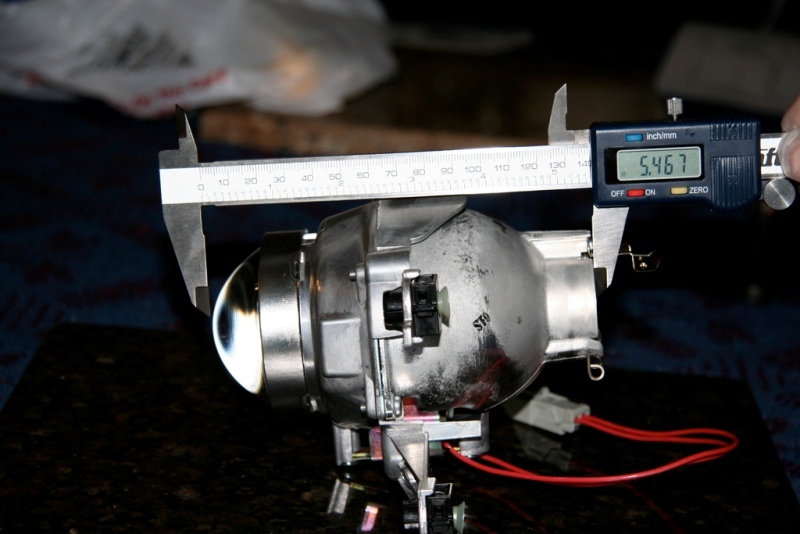 Pictures
of G35 Projector. The G35s appear to be similar
to the FX35 but with different mounting Pictures
of G35 Projector. The G35s appear to be similar
to the FX35 but with different mounting
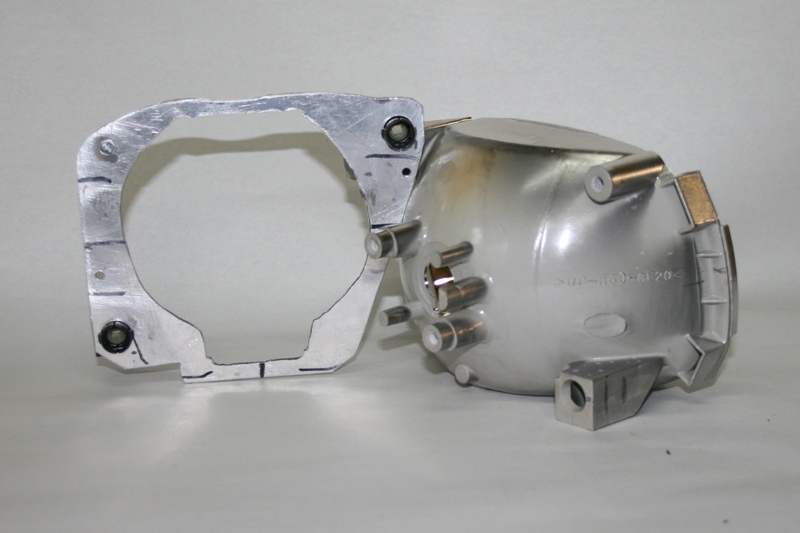
2.Cut off Shield to RHD
I have been working on this overall project
for 6 months now and the lights are still not
fitted into the car, but I have made good progress.
The first MAJOR task was to convert the cut
off shield from LHD as in the US to RHD as in
Oz. This has been a major fiddly job with heaps
of cutting and gluing things in place. The addition
of the clear lens appears to change the focal
length slightly and the cut off shield required
a slight repositioning so as to achieve a sharp
cut off.
The original LHD shield had a __/--- shape,
where as the RHD conversion is now a ---\___
shape.
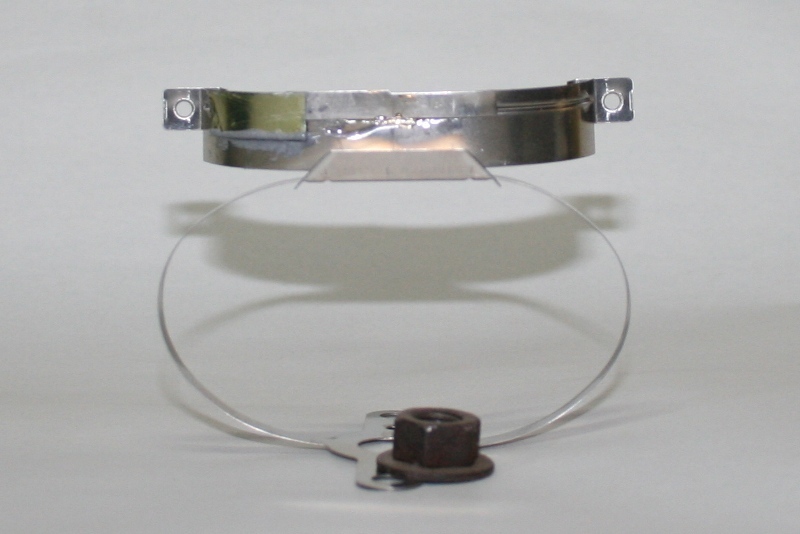
Picture of RHD converted cut off shield
4.Opening R33 Standard Headlight
I didn’t want to use my original GTR headlights
for this project, as I would like to be able
to return the car back to standard if required.
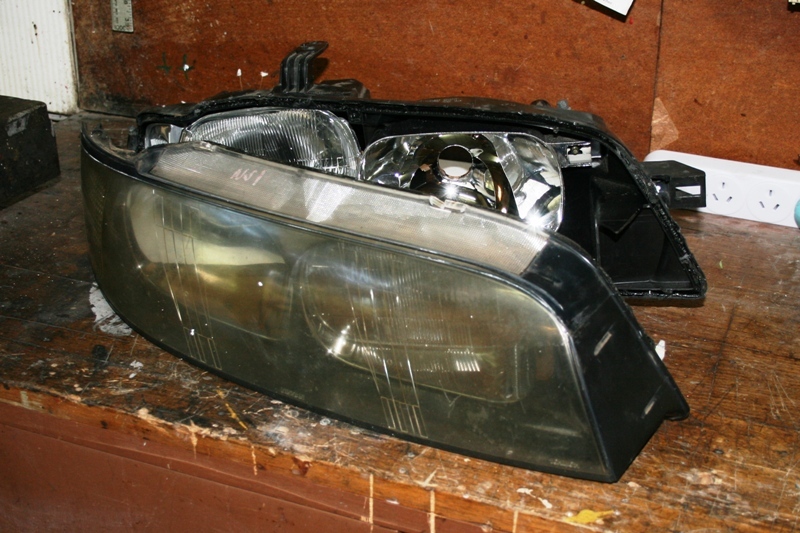
I decided to watch eBay and sure enough a pair
of R33 series 1 headlights came up. I purchased
them and they arrived in good working order.
Both headlights have the plastic headlight lens
a paler shade of yellow which will have to be
polished out at a later date.
There are quite a few articles on the WEB on
how to open the headlight assemblies up. Basically
you remove all the hardware from the headlight
and stick the assembly into a preheated oven
at 260F for about 7 minutes. Then using screw
drivers, prise open the headlight assembly.
 Opened Headlight Assembly
5.Mounting Bracket
The mounting bracket fits inside the headlight
and replaces the low beam reflector assembly.
This bracket allows mounting of the new G35
projector light. I bought a damaged second hand
R33 headlight for testing. I cut various cardboard
templates for testing and sizing etc, and finally
transferred this template it to a 1.6mm aluminium
plate. I used the plastic adjustments that came
with the G35 projectors to allow headlight adjustment.
Some articles on the HID forums cut holes in
the original reflector and glue the new projector
in place while other articles fit the new projector
with a mounting bracket. I chose the mounting
bracket method.
6.Mounting the New Projector
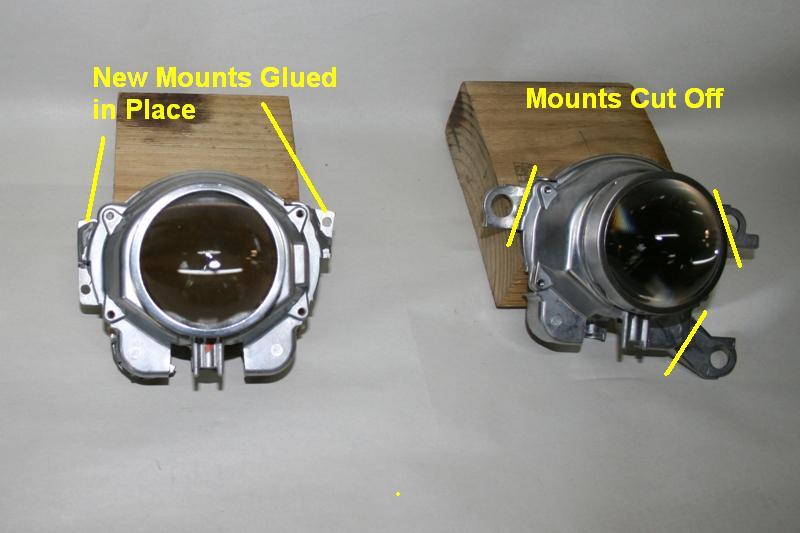
7.Projector Mounting Brackets
I cut most of the original mounting brackets
off the G35 projector and glued some aluminium
plate to the projector to facilitate mounting
to the brackets.
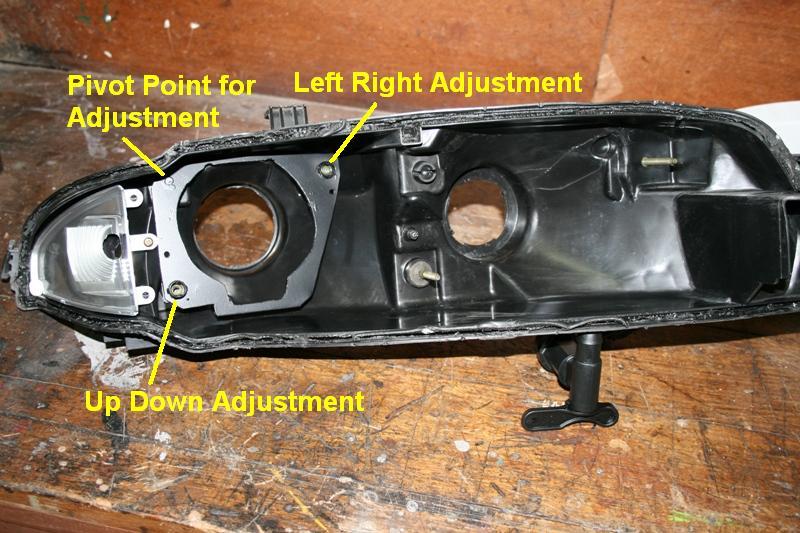
8.Mounting Bracket in Headlight Assembly
This shows the mounting bracket attached to
the headlight assembly along with adjustments.
I painted the bracket matt black to hide it
when assembled.
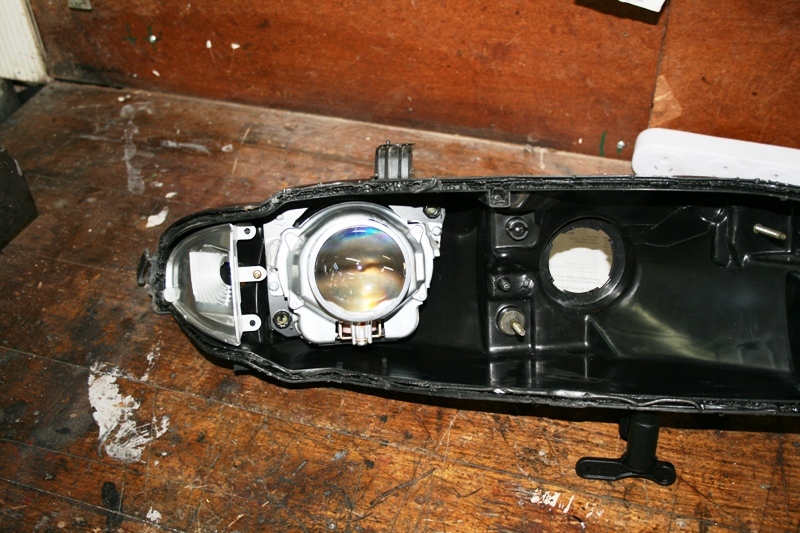 9.Projector Mounted on Bracket
Projector finally mounted in headlight assembly.
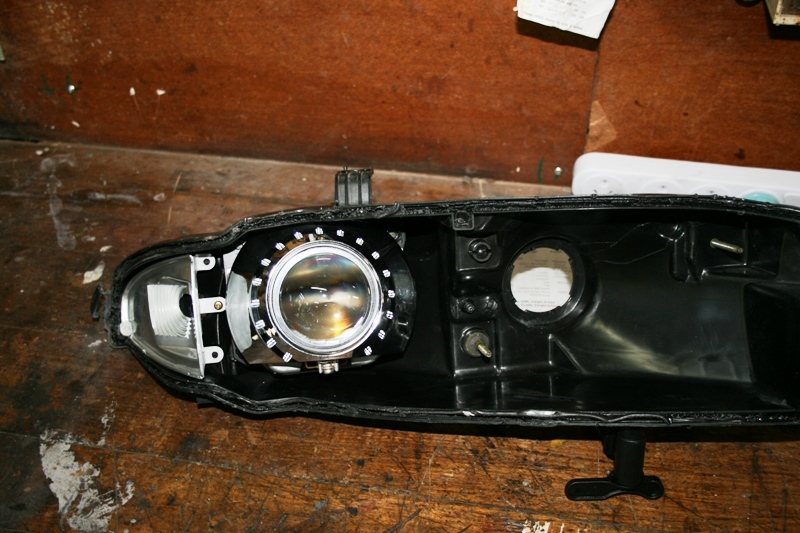
10.Trial Fit of the E46 Bezel
Pair of E46 bezels were trimmed to fit around
the projector to hide most of the construction
work. Clearance will have to checked when the
plastic headlight lens is refitted.
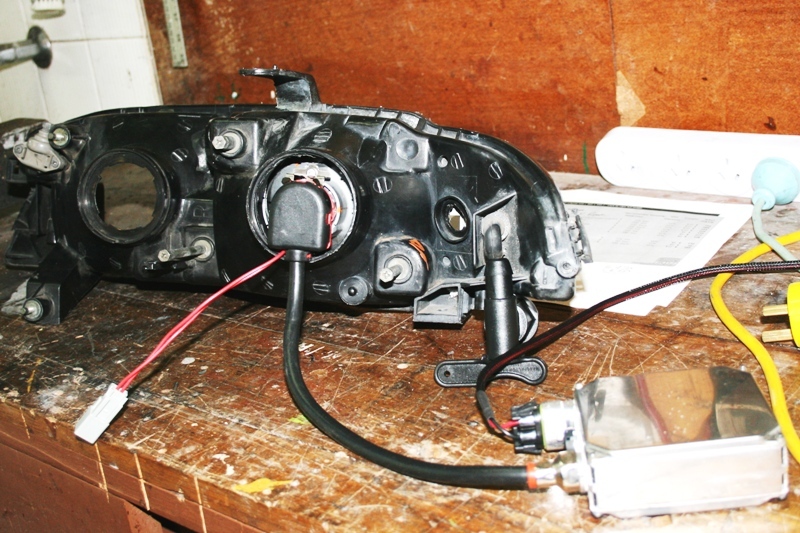
11.Rear View
This shows the rear view with high voltage ballast
cable connected. I was particularly please to
have the projector nicely centred in the original
hole at just the right depth. I have been trialling
a cover for this end of the projector and a
spray can top looks to be promising.
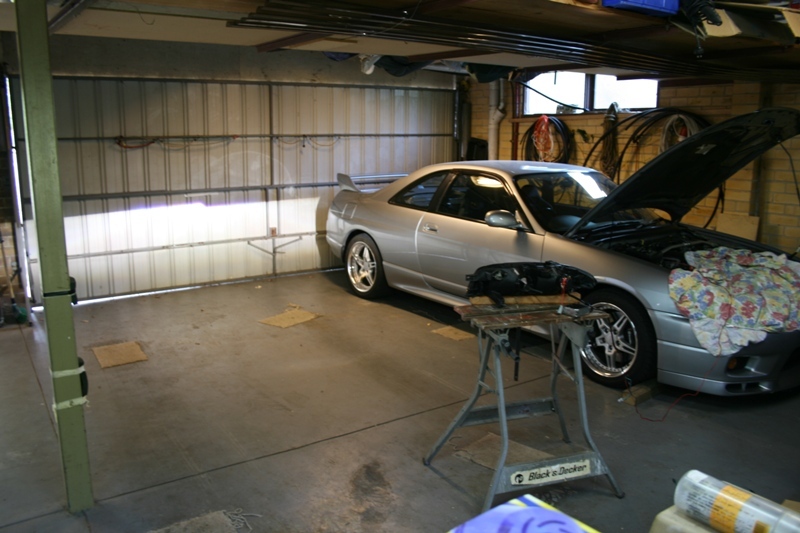
Powered Up
This photo shows the projector powered up and
operational on a bench at last! I roughly adjusted
the projector for up/down and left/right to
ensure it had sufficient travel. Note the sharp
cut off and the blue haze above the cut off.
The rear photo above was taken after the projector
had been roughly aligned.
That’s about the end of part one.
A few things are left to do:
- I have to complete the same work for the left
hand headlight; most of the fabrication work
is done, just a bit of filing, gluing and assembly
is still required.
- I am working on the wiring diagram and I think
I have most of it nutted out now. Ideally, I
will build a plug and play so the projector
wiring loom will plug into the existing wiring
loom (no cuts). This will allow the headlights
to be returned back to original if required.
- Polish up the plastic headlight lenses.
Hope to have part 2 with results in about a
month or so.
|